Here is a tutorial how to convert photos into a rubik's cube mosaics with Photoshop. Photo used for this Photoshop tutorial is taken from Pixabay. The first step is to add contrast and vibrant to photos to make it aesthetically more bright colors. The next step is to change the color of your photos into cartoons color using the surface blur filter and poster edges filter. The third step is to apply a pixelate filter mosaic. Adjust the size of the mosaic cubes depending on your photo. Next we create a new document with the same size with the filter mosaic size that has been created earlier. Give stroke with a size of 1 pixel, then create create a pattern using the command Define Pattern. And lastly apply the pattern in a new layer. Let's get started:
Stock 654029.
1. Open The Photo
Choose File> Open, select your photo and then click the Open button.
2. Adjust Photo Contrast
Choose Image> Adjustments> Brightness / Contrast. I'll move the slider to the right contrast.
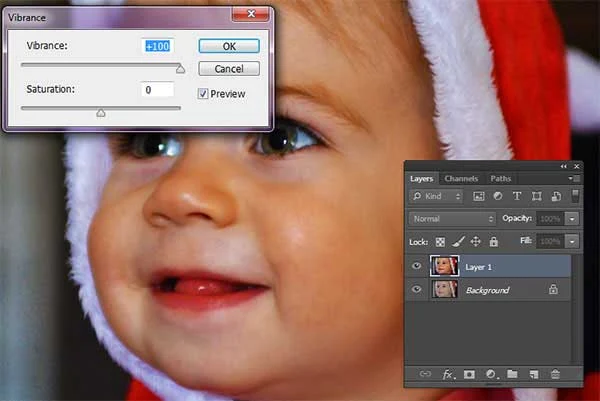
3. Adjust Photo vibrant
Choose Image> Adjustments> Vibrance. I'll move the vibrance slider to the right.
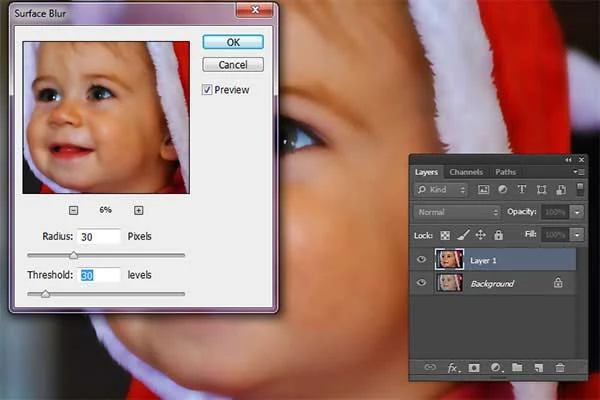
4. Apply Surface Blur Filter
Choose Filter> Blur> Surface Blur. I'll fill in the radius of 30 pixels and also 30 pixels for Threshold.
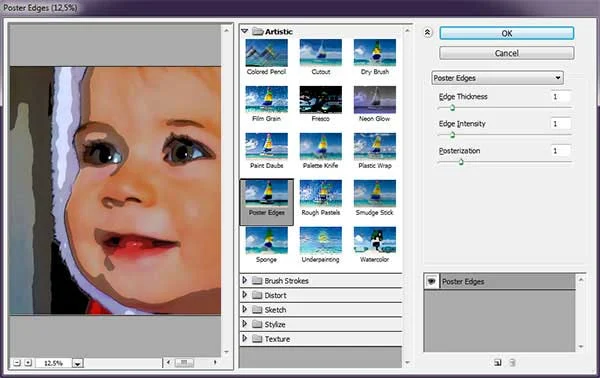
5. Apply Poster Edges Filter
Choose Filter> FIlter Gallery> Artistic> Poster Edges. I will fill Edge Thickness: 1, Edge Intensity: 1, and posterization: 1. Please adjust these values depending on your photo.
6. Apply Mosaic Filter
Choose Filter> Pixelate> Mosaic. I'll fill in cell size: 60 square. Please set the value of cell size depending on your photo.
7. Create a new document sized 60x60
Choose File> New. Enter the Height and Width 60 pixels respectively.
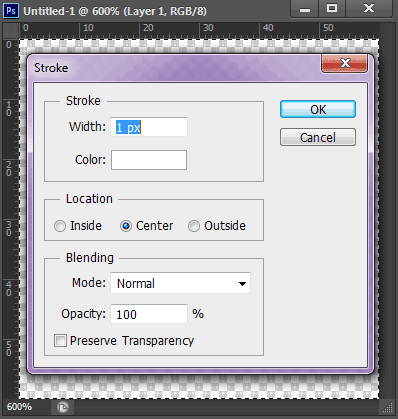
8. Stroke The Document
Make a selection by choosing Select> All, then stroke by choosing Edit> Stroke.
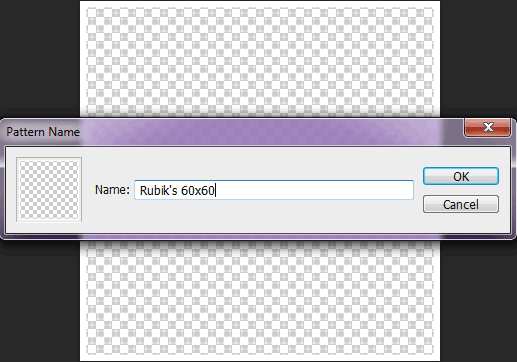
9. Define Pattern
Choose Edit> Define Pattern. Please give the name of the pattern. Subsequently close the document by choosing File> Close.
10. Create a New Layer
Back to the main document. Create a new layer by choosing Layer> New Layer.
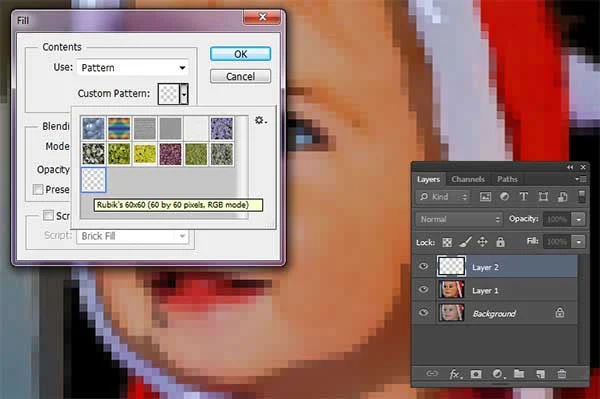
11. Apply Rubik's Cubes Pattern Into a New Layer
Choose Edit> Fill. Use column select Pattern and choose the pattern rubiks we have made in the field of custom pattern.
Here is the result:





No comments:
Post a Comment