Kaleidoscope is a geometric shape composed of shapes and colors with a symmetrical arrangement. We will try to make a kaleidoscope digitally using Photoshop from a given image. Once the image is open in Photoshop, we'll build up the kaleidoscope by duplicating, rotating, and blending the layer several times to achieve symmetry. Rotate the image as many as 5 times each flip horizontally, flip vertically, and 3 times 45 degrees flip. Each rotation result will be on a separate layer so we can easily adjust its size. Let's get started!
For this Photoshop tutorial, I'll use this image, fish-155279, that downloaded from Pixabay.
1. Open an Image File
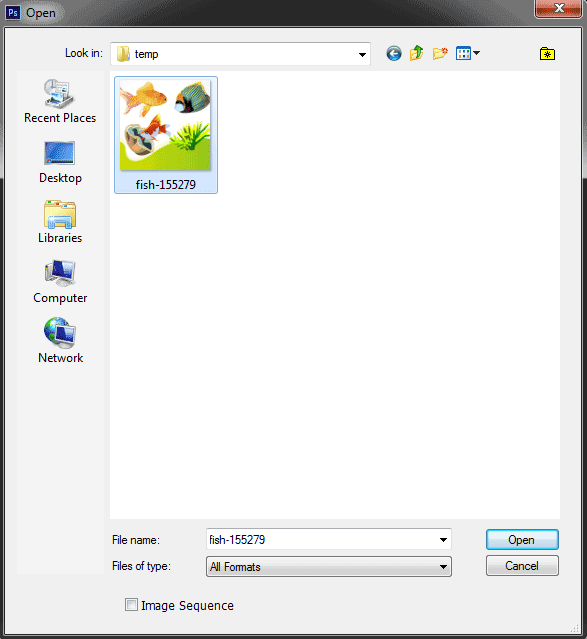
Choose File>Open or else just press Ctrl+O to Open up your base image in Adobe Photoshop. The standard Open dialog box appears. Navigate to the folder that contains your file then select the name of the file you want to open. If your file does not appear, try to view all files by selecting All Formats from the Files of type list. Click the Open button.
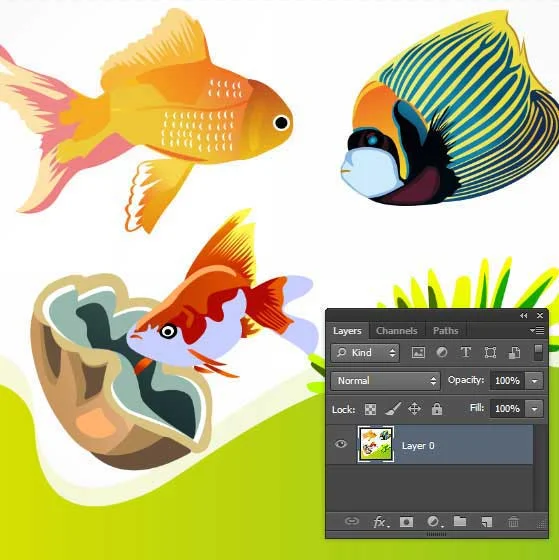
Unlock the Background layer by choosing Layer> New> Layer from Background.

The Open dialog box.
Unlock the Background layer.
2. Merge Visible Then Flip Horizontal
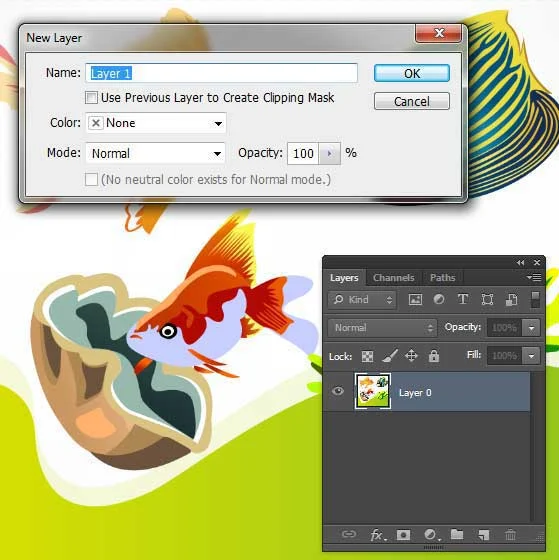
Create a new layer by choosing Layer>New>Layer or else just press Shift+Ctrl+N. The New Layer dialog box appears allowing you to name your layer and specify other options. Leave the default settings and click OK. In the Layers panel, a layer with the default name of Layer 1 appears above Layer 0, if it is not, drag the new layer (Layer 1) to the top position.
Merge visible all the layers into the new layer (Layer 1) by going to Layer>Merge Visible while the Alt key held down or else just pressing Shift+Ctrl+Alt+E.
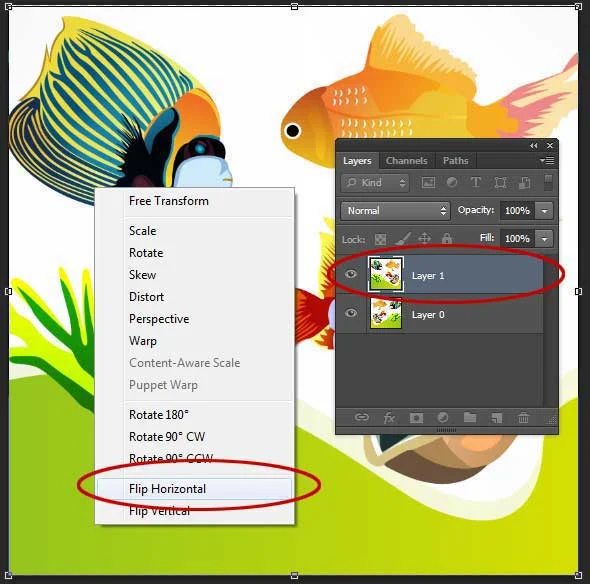
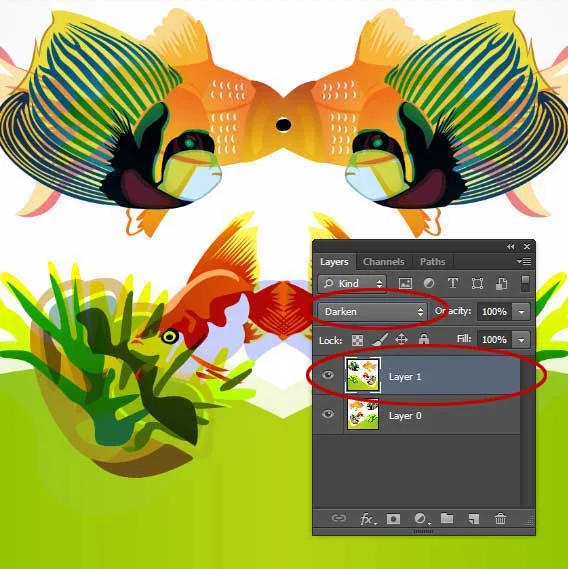
Choose Edit>Free Transform (or just pressing Ctrl+T) to invoke the Free Transform then right-click on the document and select Flip Horizontal. Press Enter to commit the transformation. Change the Blend modes on the Layers panel from Normal to Darken.
The New Layer dialog.
Merge visible all the layers into the new layer (Layer 1) by going to Layer>Merge Visible while the Alt key held down.
3. Merge Visible Then Flip Vertical
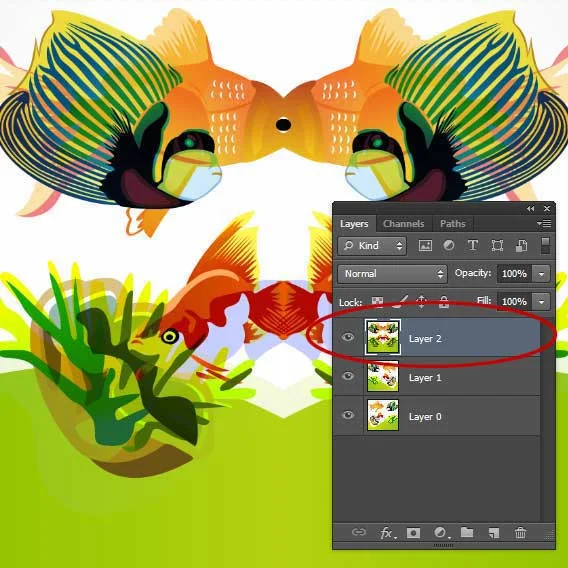
Create a new layer by choosing Layer>New>Layer or else just press Shift+Ctrl+N. The New Layer dialog box appears allowing you to name your layer and specify other options. Leave the default settings and click OK. In the Layers panel, a layer with the default name of Layer 2 appears above Layer 1, if it is not, drag the new layer (Layer 2) to the top position.
Merge visible all the layers into the new layer (Layer 2) by going to Layer>Merge Visible while the Alt key held down or else just pressing Shift+Ctrl+Alt+E.
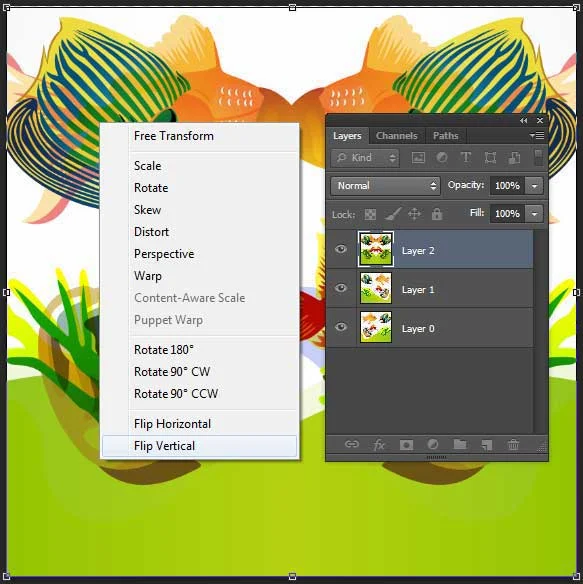
Choose Edit>Free Transform (or just pressing Ctrl+T) to invoke the Free Transform then right-click on the document and select Flip Vertical. Press Enter to commit the transformation. Change the Blend modes on the Layers panel from Normal to Darken.
Merge visible all the layers into the new layer (Layer 2) by going to Layer>Merge Visible while the Alt key held down.
4. Merge Visible Then Flip 45 degrees
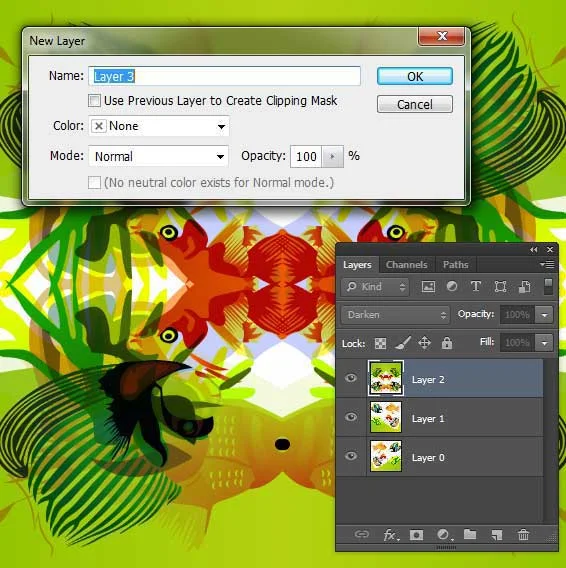
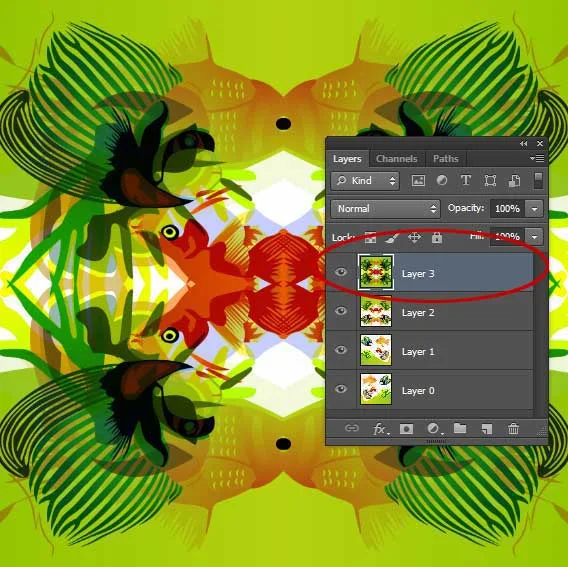
Create a new layer by choosing Layer>New>Layer or else just press Shift+Ctrl+N. The New Layer dialog box appears allowing you to name your layer and specify other options. Leave the default settings and click OK. In the Layers panel, a layer with the default name of Layer 3 appears above Layer 2, if it is not, drag the new layer (Layer 3) to the top position.
Merge visible all the layers into the new layer (Layer 3) by going to Layer>Merge Visible while the Alt key held down or else just pressing Shift+Ctrl+Alt+E.
Choose Edit>Free Transform (or just pressing Ctrl+T) to invoke the Free Transform then fill 45 degrees on the options bar. Press Enter to commit the transformation. Change the Blend modes on the Layers panel from Normal to Darken.
The New Layer dialog.
Merge visible all the layers into the new layer (Layer 3) by going to Layer>Merge Visible while the Alt key held down.
5. Repeat step 4 (2 times)
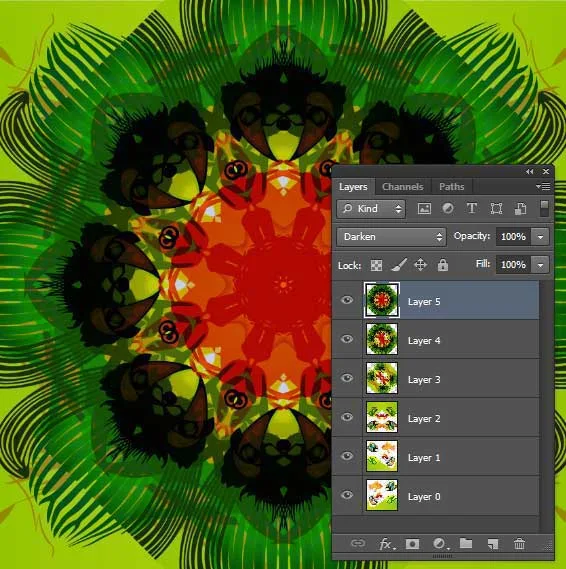
Repeat step 4 for 2 times in order to get a symmetrical shape.
Symmetrical Shape Kaleidoscope.
6. Group All Layers
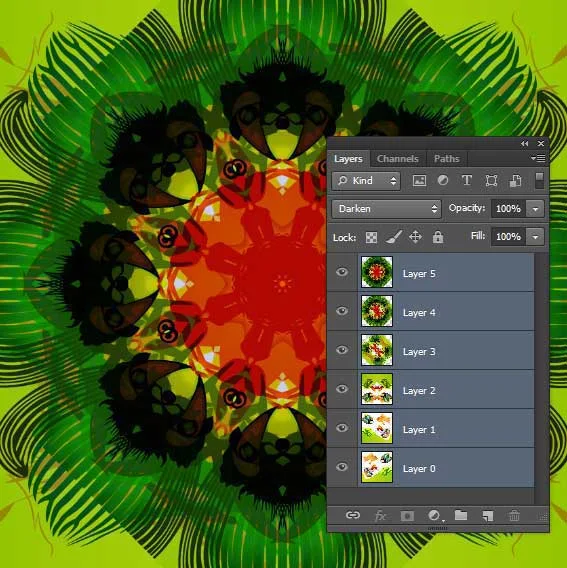
While holding down the Shift key, click on all layers then choose Layer> Group Layers.
While holding down the Shift key, click on all layers.
7. Merge Visible
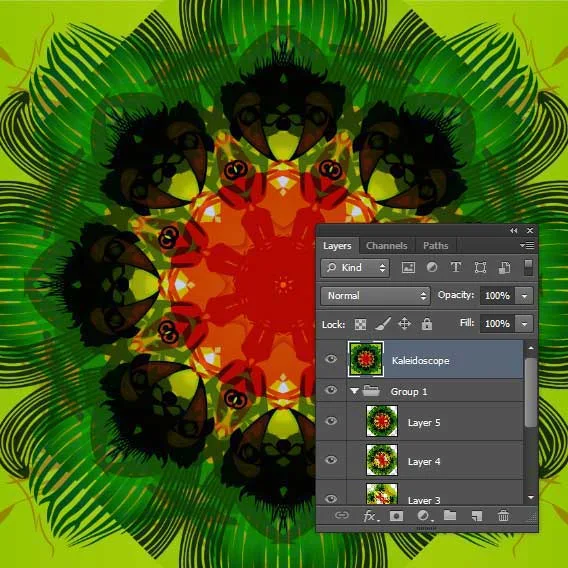
Merge visible all the layers into the new layer (Layer 6) by going to Layer>Merge Visible while the Alt key held down. Give a new name like “Kaleidoscope”.
Merge visible all the layers into the new layer (Layer 6) by going to Layer>Merge Visible while the Alt key held down.
8. Resize the Kaleidoscope Layer Using Free Transform (If You need to)
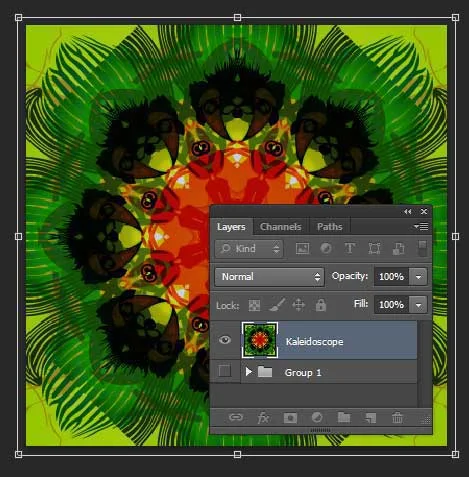
Select the Kaleidoscope layer then choose Edit>Free Transform or else just press Ctrl+T. You can edit the Kaleidoscope layer as follows:
Resize the Kaleidoscope layer by dragging any corner while holding down the Shift key to keep the shape does not distort.
Move the Kaleidoscope layer by clicking and hold anywhere inside the Kaleidoscope layer and drag.
Rotate the Kaleidoscope layer by moving your cursor farther out from any corner until you see two arrows. Click and hold, then drag the Kaleidoscope layer.
Press Enter key when you are done.
Resize the Kaleidoscope Layer Using Free Transform.
9. Boost Tone And Contrast Using Curves Adjustment Layer
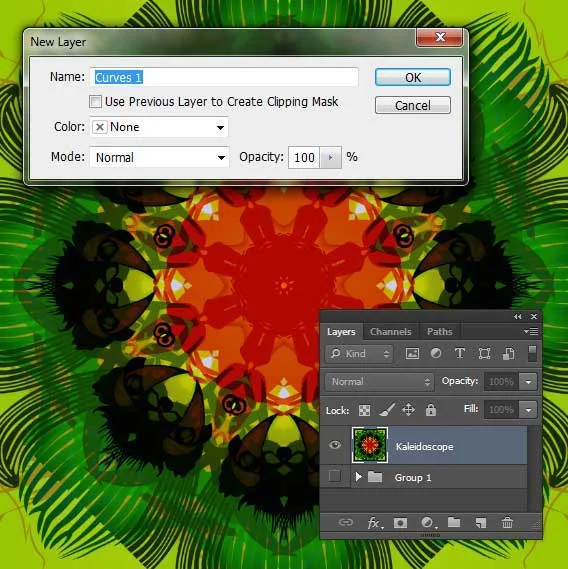
Create a Curves Adjustment Layer. Choose Layer>New Adjustment Layer>Curves. The New Layer dialog box appears. In the New Layer dialog box, name the layer if you want, leave the other options at their defaults, and click OK. The Curves controls display on the Properties panel. Adjust the curve to boost tone and contrast. Click the clipping mask icon to clip the Curves adjustment to the layer below it.
The New Layer dialog box appears.
10. Save the Document
Choose File>Save or else just press Ctrl+S to save your project file. The Save As dialog box appears. Navigate to the folder where you want to store the file. Type a name in the File Name text box and leave the default Photoshop (*.PSD;*.PDD) format. Click Save to store the image.
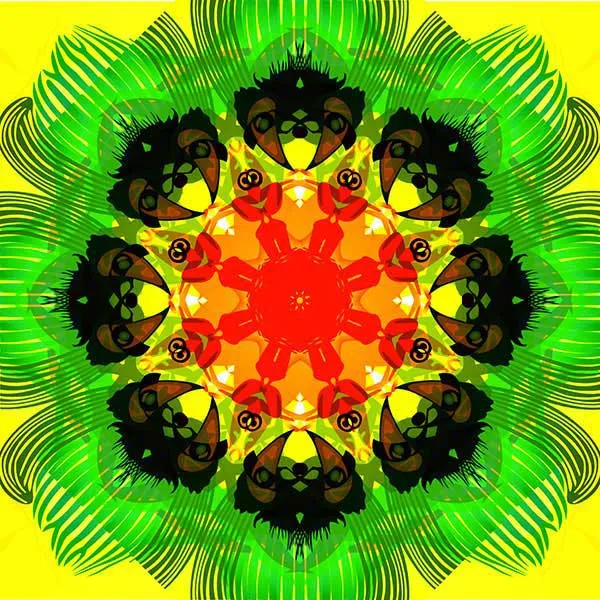
Here is the result:
Create a Kaleidoscope Effect In Photoshop.
More on Photoshop Tutorials:

-to-the-top-position-min.jpg)


-to-the-top-position-min.jpg)

-to-the-top-position-min.jpg)



-min.jpg)

No comments:
Post a Comment