Photoshop has a Photo Filter Adjustment. Photo Filter is a tool that is easy to use and quick to make the picture becomes warmer or more shade. But if we want a more flexible arrangement, then the gradient map adjustment is a better choice. At this tutorial we will explained how to create a sunset effect using a gradient map. Photo used in this Photoshop tutorial is taken from Pixabay.com. Let's get started.
Stock: cowboy
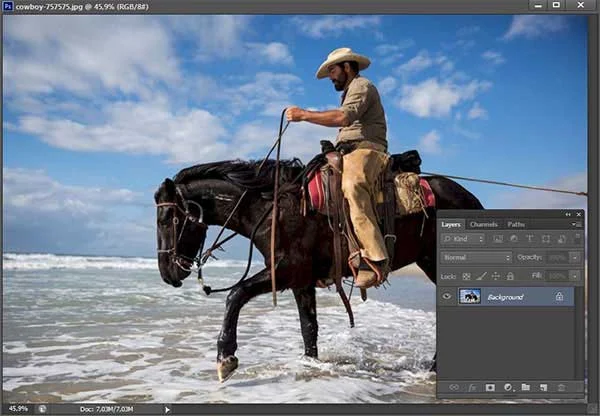
1. Open the Photo With Photoshop
Select menu File> Open, click on your photo and then click the Open button.
Open the photo.
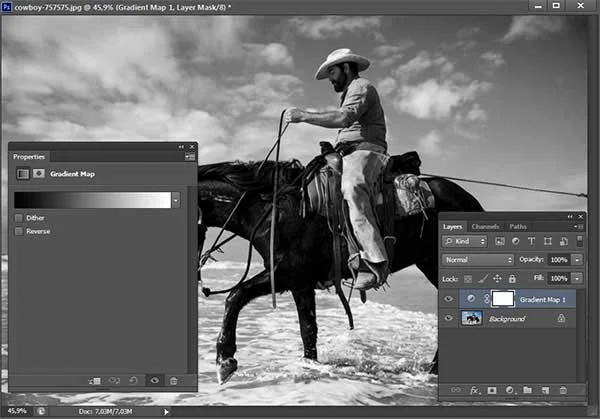
2. Create a Gradient Map
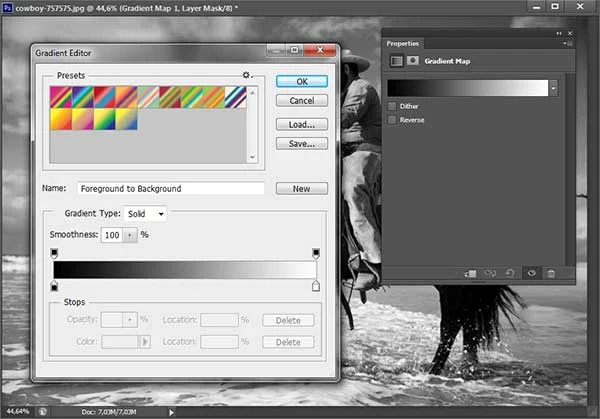
Choose Layer> New Adjustment Layer> Gradient Map. If the properties do not appear, double-click on the circle to the left of the gradient map layer to display it. Then click on the drop down menu gradient (circled in red) to edit the color. Gradient editor window will appear.
Create a gradient map.
3. Set The Left Color/Dark Area With Red
In the gradient editor window, click on the left slider below then click the color box. Color picker window will appear. In the color picker window, select the color red.
Gradient left select red.
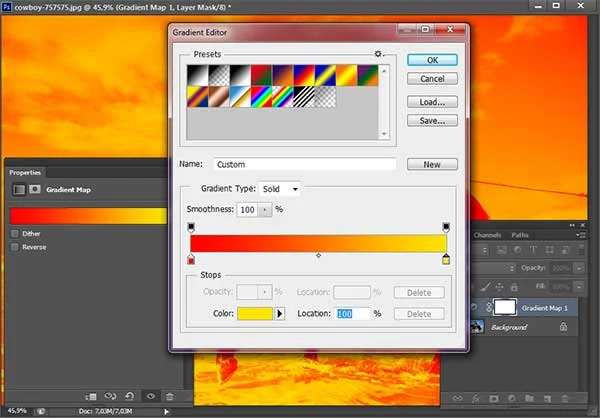
4. Set The Right Color/Light Area With Yellow
In the gradient editor window, click on the bottom right slider and then click the color box. Color picker window will appear. In the color picker window, select the color yellow. Then click the OK button to close the window gradient editor. Your photo should now yellowish red.
5. Change the Blend Mode to Overlay
Change the gradient map layer's blend mode to overlay and set the opacity to a value of 60 or 70%, depending on your picture.
6. Set the Level of Light By Adding Curves Adjustment
If your photo looks dark, adjust the light level by using Curves. Choose Layer> New Adjustment Layer> Curves. Click on the bow and then drag slightly upward in order to obtain clearer photo. Up here our sunset photo effect already finished. If the results are unsatisfactory, double click on the circle to the left of the gradient map layer to display the gradient editor. Edit the colors red and yellow to obtain a better results.
Adjust the brightness of the light by adding a Curves.
Here is the photos before applying gradient map:
Photo before applying gradient map.
And here is the result:
Photoshop tutorial, how to create sunset effect using gradient map.


No comments:
Post a Comment