Here is tutorial using GIMP to put an image inside text. Put An Image Inside Text using GIMP is pretty easy to do. What we need to do is create an empty layer above the layer image and then make a selection from the text that we create and delete parts of the selection so that a portion of the photo will look appears on text. To make a selection from the text we can use the command Layer> Transparency> Add to selection. In addition we can add a stroke on the text with the command Edit> Stroke Selection. If you still want to add a drop shadow and please use the Filters> Light And Shadow> Drop Shadow. Photo used in this GIMP tutorial is taken from Pixabay. Let's get started.
1. Open the Photo
Open GIMP application and then choose File> Open to open your picture. For this effect I will use a photo with 600x300 pixels wide.
Open Photo.
2. Create a New Layer
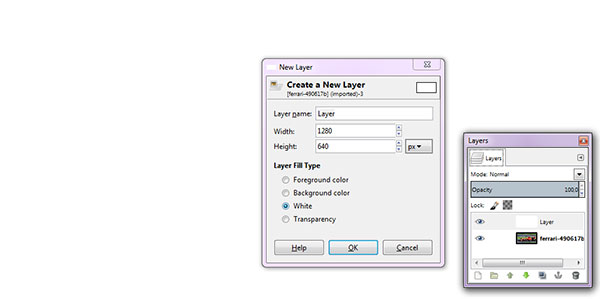
Choose Layer> New Layer. In the Layer Fill Type, I will click the white color. You can choose another color.
Fill with color.
3. Select the Text Tool
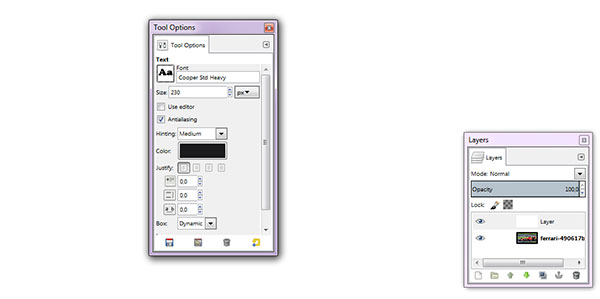
To write the text, click the Text Tool icon in the Toolbox. In the Tool Options tab, please select the type and size of font.
4. Write Text On Document
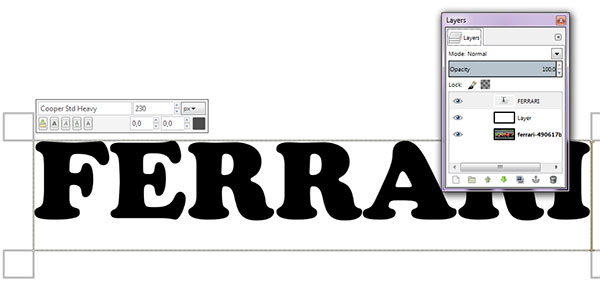
Click the mouse on the canvas and then write your text. I will write the 'FERRARI' text.
Type the text on the canvas.
5. Adjust Text On Canvas
Make sure the Text layer is selected by clicking on it. Click the Move Tool icon in the Toolbox. Click on the text and drag it to position it on the canvas. Furthermore, set the font size using the Scale tool by choosing Tools> Transform Tools> Scale. You may click on the boundary box (see picture circled in red) then drag it out to enlarge the font or you may also adjust the height and width Scale window.
Scale Text to be sufficient to canvas size.
6. Make Selection In Text
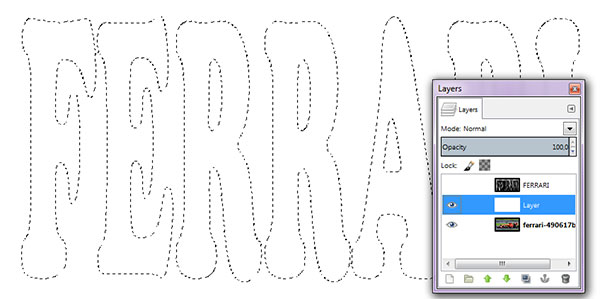
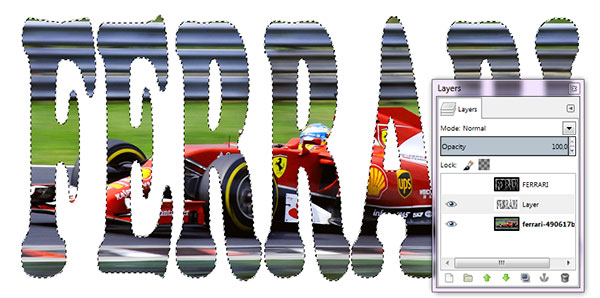
The next step is to make a selection from the teks. Choose Layer> Transparency> Add to selection. Click the eye icon to the left of the layer to remove its visibility option.
7. Activate The White Layer and press the Delete key
Activate The White Layer and then press the Delete key on the keyboard. The image below will appear in the selection area.
Delete on selection.
8. Add Stroke
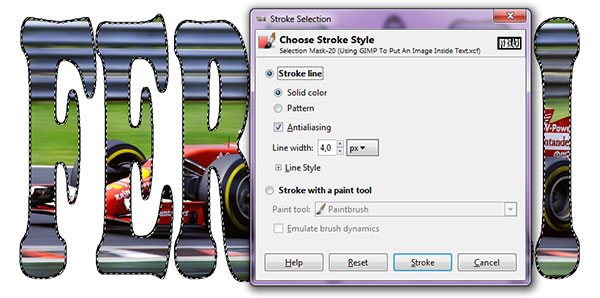
The last step is to add a stroke to the text by choosing Edit> Stroke Selection. Fill Line Width, and click the button Stroke. Remove the selection by choosing Select> None.
Make Stroke Selection.
Here is the result:
How To Put An Image Inside Text in GIMP.
More on GIMP Tutorials:



No comments:
Post a Comment