GIMP Filter Filters> Enhance> Unsharp mask is suitable for images that have a lot of noise or grain. We can set the value Radius, and Threshold Amount to obtain sharpness of the image that we want. Should apply unsharp mask filter to the duplicate layer, so that we can restore the original image if the results are not satisfactory. Previously, doing optimization on the images first such set image size and croping. Provide unsharp mask filter is the last step. Photos are used for this GIMP tutorial is taken from the website Pixabay.com. Follow the steps below to sharpen image with unsharp mask GIMP.
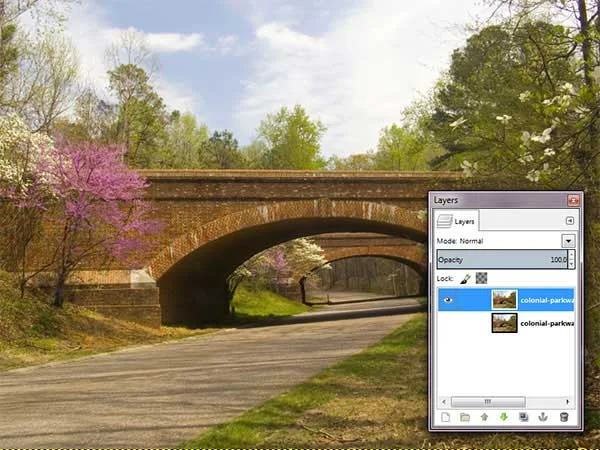
Stock colonial-parkway-80641.
1. Open the Photo And Duplicate Layer
Select menu File> Open. In the Open Image window, select your photo and then click the Open button. Further double layer by choosing Layer> Duplicate Layer. We will apply the unsharp mask filter to the duplicate layer so that the original photo is not corrupted.
2. Zoom Image up to 100%
Choose View> Zoom> Zoom in. Perform up to 100% zoom level so that we can easily distinguish the results of the sharpness of the image.
3. Apply the Unsharp Mask filter On Duplicate Layer
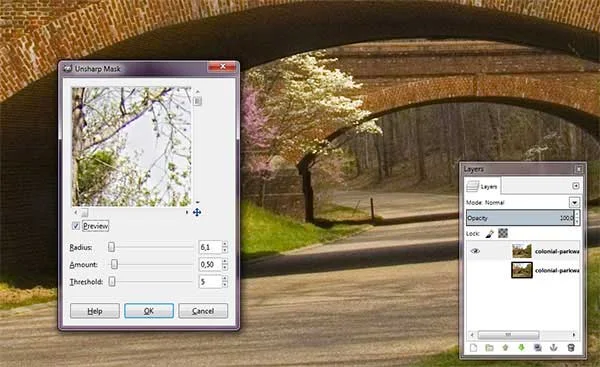
Click the duplicate layer then select the menu Filters> Enhance> Unsharp Mask. Unsharp Mask window will appear. Set the Radius, and Threshold Amount, then click the OK button.
And here is the image after applying unsharp mask filter:
How To Sharpen photo With GIMP.


No comments:
Post a Comment